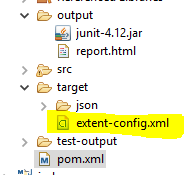
Search

Automation Proficient

Experience the taste of Automation

Maven POM.xml for TestNG

Project Structure:

<groupId>Demo</groupId><groupId>Demo</groupId>

<artifactId>Insomnia1</artifactId>

<version>0.0.1-SNAPSHOT</version>

<packaging>jar</packaging>
<name>Insomnia1</name>

<url> http://maven.apache.org </url>
<properties>

<project.build.sourceEncoding> UTF-8 </project.build.sourceEncoding>

</properties>

<dependencies>

<dependency>

<groupId>junit</groupId>

<artifactId> junit </artifactId>

<version>4.12</version>

<scope>compile</scope>

</dependency>

<dependency>

<groupId>info.cukes</groupId>

<artifactId> cucumber-junit </artifactId>

<version>1.2.5</version>

<scope>test</scope>

</dependency>

<dependency>

<groupId>org.testng</groupId>

<artifactId>testng</artifactId>

<version>6.11</version>

<scope>compile</scope>

</dependency>

<dependency>

<groupId>info.cukes</groupId>

<artifactId> cucumber-testng </artifactId>

<version>1.2.5</version>

</dependency>

<dependency>

<groupId>org.seleniumhq.selenium

</groupId>

<artifactId> selenium-server </artifactId>

<version>3.5.3</version>

</dependency>
<dependency>

<groupId>info.cukes</groupId>

<artifactId> cucumber-java </artifactId>

<version>1.2.0</version>

<scope>test</scope>

</dependency>

</dependencies>

<build>

<sourceDirectory> src/test/java </sourceDirectory>

<plugins>

<plugin>

<groupId>org.apache.maven.plugins

</groupId>

<artifactId>maven-compiler-plugin</artifactId>

<version>3.3</version>
<configuration>

<encoding>UTF-8</encoding>

<source>1.8</source>

<target>1.8</target>
<suiteXmlfiles>

<suiteXmlfile>testng.xml</suiteXmlfile>
</suiteXmlfiles>
<compilerArgument>-Werror</compilerArgument>
<systemPropertyVariables>

<property>

<name>browser</name>

<value>${browser}</value>

</property>

<property>

<name>cloud_config</name>

<value>${cloud_config}</value>

</property>

</systemPropertyVariables>
</configuration>

</plugin>

</plugins>

</build>

</project>

Contributers:
Sandeep Tiwari

Cucumber Extent Reporting

(Source: https://www.qadiaries.com/post/cucumber-extent-reporting)

To implement cucumber extent reporting you need to follow the steps as mentioned below :

  1.  Download Java 8+ version .
  2.  Extent reports version 3.0.6+ is required, you need to add following dependency in pom.xml for maven project:
<dependency>
<groupId>com.aventstack</groupId>
<artifactId>extentreports</artifactId>
<version>3.0.7</version>
<scope>provided</scope>
</dependency>

If it is a java project ,download the jars from this url.

3.  Add dependency for cucumber extent report:

<dependency>
<groupId>com.vimalselvam</groupId>
<artifactId>cucumber-extentsreport</artifactId>
<version>3.0.1</version>
</dependency>

4.  Make sure maven-complier-plugin  AND maven-surefire-plugin  are present in the pom.xml, otherwise add their dependencies as mentioned below:

<dependency>
<groupId>org.apache.maven.plugins</groupId>
<artifactId>maven-compiler-plugin</artifactId>
<version>3.6.1</version>
<type>maven-plugin</type>
</dependency>
<groupId>org.apache.maven.plugins</groupId>
<artifactId>maven-surefire-plugin</artifactId>
<version>2.18</version>

5.  Download extent-config.xml file from here and add it to “target” folder of your project.

Capture

6.   Create a runner class and add the plugin in @CucumberOptions as com.cucumber.listener.ExtentCucumberFormatter:output/report.html  followed by the report file as input parameter.

A sample example is shown below:

import org.junit.runner.RunWith;
import org.testng.annotations.AfterClass;
import com.cucumber.listener.Reporter;
import java.io.File;
import cucumber.api.CucumberOptions;
import cucumber.api.junit.Cucumber;

@RunWith(Cucumber.class)
@CucumberOptions(format = { "pretty", "json:target/json/output.json" },
 features = {"C:\\Users\\Adminindia\\workspace\\shaurya\\cookies\\src\\test.feature"},
 glue = {"step_definitions"}, tags = {"@tag1"},
 plugin = {"com.cucumber.listener.ExtentCucumberFormatter:output/report.html"})

public class testrunner {
	@AfterClass
	public static void teardown() {

		Reporter.loadXMLConfig(new File("target/extent-config.xml"));
		Reporter.setSystemInfo("user", System.getProperty("user.name"));
		Reporter.setSystemInfo("os", "Mac OSX");
		Reporter.setTestRunnerOutput("Sample test runner output message");
	}
}


The above setup will generate the report in output directory with the name of report.html

The report will be generated as shown below:


Contributor:

Shaurya Nigam

Appium Setup

  1. DownLoad Eclipse IDE.

  2. Download PDANet+

  3. Download Java JDK.

  4. Set Up Java Environment System Variable/Path

    Step 1: Setting the JAVA_HOME Variable

    1. Right-clicking on ‘My Computer’ and choosing Properties.Java_Environment_Path_1
    2. Choose ‘Advanced system settings‘.Java_Environment_Path_2
    3. Under the Advanced tab Choose the ‘Environment Variable…‘ option.Java_Environment_Path_3
    4.  Select New In the System variables.Java_Environment_Path_4
    5.  Define the Variable name as ‘JAVA_HOME‘ and Variable value as ‘C:\Program Files\Java\jdk1.8.0_45 (for this example JDK version 1.8.0 was installed in ‘C:\Program Files\Java\jdk1.8.0_45‘ folder; if needed, modify the real location).Java_Environment_Path_5

      Step 2: Setting the PATH Variable

      1. Now we need to specify the location in the PATH variable. For PATH, most probably it will already exists in your machine. So just select it and choose the Edit option.Java_Environment_Path_6
      2. In the editor add the value ‘;%JAVA_HOME%\bin‘ or ‘;C:Program Files\Java\jdk1.8.0_45\bin‘. Java_Environment_Path_7
      3. Now Open cmd . It will launch the Command Prompt. Type ‘java -version‘, it will display the following information. Java_Environment_Path_8
  5. How to Install Android SDK on Windows

    a) After download download following packages:

    1. Respective Android Version packages (ex: Android 6.0 ‘API 23’)
    2. Android SDK Build-tools
    3. Android SDK Platform-tools
    4. Google USB Driver
    5. Google Web Driver

b) Set Environment Variables:

1. Under the User Variable table, click New.

image001

2. Put ANDROID_HOME as Variable name and provide the path of the SDK folder next to Variable value and click OK.

3. Go to the folder where SDK has been installed.

4. Inside the SDK folder look for ‘tools’ and ‘platform-tools’ folder.

5. Copy the path for both tools and platform-tools.

6. Open ‘Environment Variables’ dialog box.

7. Go to System Variables table and locate the Path variable.

8. Select path and click on Edit.

9. Add the ‘tools’ and platform-tools’ folder’s full path, as shown below.

image003

Now Lets Setup Ecllipse:

  1. Install Ecllipse Add on from Eclipse MarketPlace

    Capture1

    1. Test NG
    2. Android Development Tools for Eclipse
    3. Android for Maven Eclipse 1.4.0Capture2
  2. Download following jars and add them into your project

    1. gson-2.8.2.jar
    2. java-client-6.1.0.jar
    3. junit-6.1.0.jar
    4. selenium-server-standalone-3.13.0.jar
  3. Download Appium Server

That’s it Finally Appium has been Set up 🙂

Contributers:
Sandeep Tiwari, Shaurya Nigam

How to scroll page in selenium- webdriver using Robot Class

Robot rb=new Robot();
rb.keyPress(KeyEvent.VK_PAGE_DOWN);
rb.keyRelease(KeyEvent.VK_PAGE_DOWN);


How to check an AutoIt Script passed or failed in selenium webdriver

The following code will run an AutoIt script i.e. CreateNew.exe

Process p=Runtime.getRuntime().exec(“exeFiles\\CreateNew.exe”);

p.waitFor(20, TimeUnit.SECONDS);

Integer result = p.exitValue();

sa.assertEquals(0, result);

Explanation:

  1. Run an AutoIt script i.e. CreateNew.exe
  2. Wait for 20 seconds for the AutoIt script to complete, if it doesn’t gets complted within 20 sec then the execution will move to next line. Note: You can change this time as per your need.
  3. This line will check whether the AutoIt script is passed or failed.
  4. Will fail the TestNG script if AutoIt is script is failed.

Blog at WordPress.com.

Up ↑